Background

Jul 6, 2010

Magnetic Wall Hanging

I am into metal in case you haven't noticed. :) For this project I used some metal from a roll of galvanized flashing that I purchased at our local Lowe's.

Once I had the 3 pieces cut I used masking tape around the edges, because this stuff is SHARP! I have also read that you can sand the edges, so I might have to give that a try.

I then covered the metal pieces with paper and used my Crop-a-dile to insert the eyelets.

To finish this project I tied ribbon between the pieces and a longer one on top to use to hang. I then made magnets out of buttons and flowers to use to attach notes, photos, etc.

Altered Jars

I love these little jars. They have an airtight lever and make great gifts. I made this set for a friend and filled the jar with her favorite candies. The tag on the front was cut out using the Storybook cartridge on the Cricut, the bird was made from a SU punch and I love using Stickles, so I added some of that as well. Beside the jar is a small monogramed notebook. I glued on paper and used the Cricut to cut out the monogram and the swirly on the top. Both of these were fun and easy to make. Kind of my thing. :)

This gift set is an altered jar with a mini photo album. I embossed on the paper I used on the top and used a stamp set from Close to my Heart. I made the mini album out of chipboard, paper from The Angel Company, rings, ribbon and on the inside of the album I used horizontal badge id holders that I picked up from Wal-Mart to hold photos.

Jul 2, 2010

Fun Gift Ideas

Here are some fun and simple gift ideas that you can make! This first one is a small desk calendar that I made out of chipboard and paper. I recently purchased the Bind-it-All! I had fun using it on this project.


This one is a small magnetic calendar that I also made out of chipboard and paper. I glued magnets on the back, so it can easily displayed on a fridge or anything else metal!

This little project uses a card sized envelope. You seal the envelope and cut off the top part, so it can be used as a lid. You then use the crimping tool to crimp the envelope, which makes it small enough to fit inside of the piece you cut off for the lid. I enclosed a little magnet inside which was made out of chipboard, paper, and stickers.

Here is a diaper folded pouch. Yep, you fold a square piece of paper like a diaper, embellish and fill with goodies. I used a 12x12 sheet of paper for this project.

Keepsake Box

I purchased these keepsake boxes from Close to My Heart and made them for my mom and mother-in-law. They were fun and not very hard to decorate. The closures on these boxes are magnetic, so they are easy to open and close.


Jul 1, 2010

Altered Clipboards

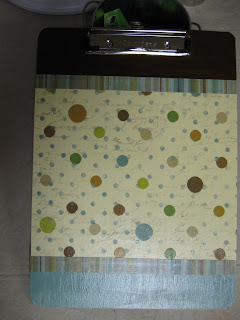
Here are some altered clipboards that I have made. I made the Snoopy one for my Secret Sister. I know I seem to say this a lot, but these too are pretty easy to make and do not take a lot of time. I glued the paper onto the clipboard using Mod Podge and once that was dry I put Mod Podge over the top of the paper, to make it more durable and able to be wiped off, and let that dry.
I absolutely love Gorilla glue! That is what I used to glue on the cork board, paper clip and the thumb tacks to the glass pebbles.
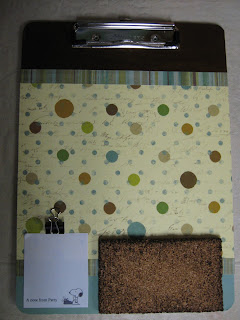
Helpful tip: When using Gorilla glue a little bit goes a long way. It expands and if too much is used you will have rock solid glue around the edges that doesn't look all that great. Yep, I know this from experience. :)
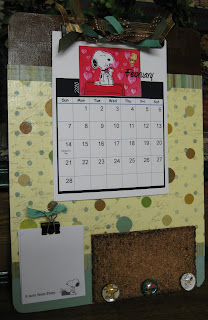
For the tacks that are on the cork boards, I glued coordinating paper to the backs of clear glass pebbles using Mod Podge glue and once that was dry I used Gorilla glue to glue on the thumb tack.
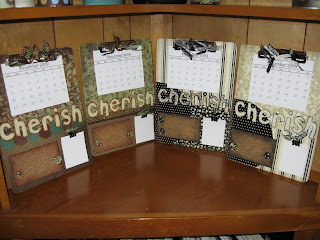
I made the calendars on the computer and attached a years worth to the clipboards, used my Cricut to cut out the letters for the word CHERISH and the paper that I used is from The Angel Company. Now you can give it a try!