Background

Jul 25, 2010

Magnetic Note Frames

I just discovered that you can use dry erase markers on glass and it wipes off! I know, I don't know where I have been, but with that discovery came the inspiration for the following Magnetic Note Frames.

This first one I used Cricut cartridges Disney-Mickey Mouse and Storybook. The flowers are magnets, making it easy to keep notes, receipts, etc. in one spot.

This Magnetic Note Frame I used Cricut cartridge A Child's Year and the tree is from the Childhood Portrait stamp set from Close to my Heart. The flower on this frame is also a magnet.

Jul 21, 2010

More fun gift projects

My children have been visiting grandparents this week, so I have been busy crafting! Here are a few things that I have been working on.

Post-It Note Holder

This project has two of my favorites: (1)Post-It notes (2)Getting to use my Bind-it-all! This Post-It Note Holder is made out of chipboard and is a fun way to keep Sticky Notes on your desk, in your purse, by the phone, etc.

Small Treat Gift
Ok, I really don't know what to call these, but they were fun and simple to make. I used my Cricut to cut the Top Note window out and you can add anything you want inside of the clear bag inside.

Mini Clipboard
I found these cute mini clipboards and decided that they would be fun to alter. It is hard to see in the picture, but I used Stickles to add some bling. If you click on the photo it will make it bigger and you can see it better. :)

Jul 13, 2010

File Folder Notebook

One project that I have been wanting to make is a File Folder Notebook, I finally remembered to look for some cute file folders and found some at Michaels the other day. This project came together pretty quickly and I think turned out cute. :)

Jul 7, 2010

Silk flowers using the Cricut

I just cut fabric with my Cricut!! This is very exciting to me, in case you couldn't tell. I went out and bought 7 different fun silk colors and was anxious to get started making some silk flowers.

These are the three colors I used for this flower.

Once put together I used the handy dandy Crop-a-dile to punch a hole in the middle and then used a brad.

I then used a Bone Folder to hold the flower in place while I used the heat gun to singe each petal of the flower to curl and crinkle it.

Here is a before and after shot. Now it is ready to put on a headband, hair tie, necklace, bracelet....

Tips and Tricks

I have come across some neat tips and tricks that have made my crafting life better, so I thought I would share them with you.

#1 Making your Cricut mat sticky again
I came across this video where someone used repositional glue to make their Cricut mat sticky again, so I had to give it a try. For those of you who do a lot of cutting with your Cricut machine you know how fast the stickyness wears off of the mats and how pricy it is to keep replacing them. I went to a local craft store and purchased a craft glue that is permanent or repositional on sale for around $2. It is repositional if applied to a project and left to dry before applying anything to it. I applied it to my not sticky mat, used a foam paint brush to spread it around really good and let it dry. It worked great!

#2 Embossing with your Cricut blade upside down
Another video that I came across was someone using their Cricut to emboss where they used their blade upside down. I have been looking at embossing machines and trying to decide which one if any I should get. After giving this a try I may not need to. Especially, since I have a Gypsy that I can design what I need and have the Cricut do the embossing for me. I purchased a package of embossing mats from Spellbinders from a local craft store, using the 40% off coupon I got them for around $6. You place the mat on your Cricut's sticky mat and then attach the paper, metal, etc. to the mat with tape, load into your Cricut and emboss away! I am all for using what you have and not spending more money if you don't have to! :)

Jul 6, 2010

Magnetic Wall Hanging

I am into metal in case you haven't noticed. :) For this project I used some metal from a roll of galvanized flashing that I purchased at our local Lowe's.

Once I had the 3 pieces cut I used masking tape around the edges, because this stuff is SHARP! I have also read that you can sand the edges, so I might have to give that a try.

I then covered the metal pieces with paper and used my Crop-a-dile to insert the eyelets.

To finish this project I tied ribbon between the pieces and a longer one on top to use to hang. I then made magnets out of buttons and flowers to use to attach notes, photos, etc.

Altered Jars

I love these little jars. They have an airtight lever and make great gifts. I made this set for a friend and filled the jar with her favorite candies. The tag on the front was cut out using the Storybook cartridge on the Cricut, the bird was made from a SU punch and I love using Stickles, so I added some of that as well. Beside the jar is a small monogramed notebook. I glued on paper and used the Cricut to cut out the monogram and the swirly on the top. Both of these were fun and easy to make. Kind of my thing. :)

This gift set is an altered jar with a mini photo album. I embossed on the paper I used on the top and used a stamp set from Close to my Heart. I made the mini album out of chipboard, paper from The Angel Company, rings, ribbon and on the inside of the album I used horizontal badge id holders that I picked up from Wal-Mart to hold photos.

Jul 2, 2010

Fun Gift Ideas

Here are some fun and simple gift ideas that you can make! This first one is a small desk calendar that I made out of chipboard and paper. I recently purchased the Bind-it-All! I had fun using it on this project.


This one is a small magnetic calendar that I also made out of chipboard and paper. I glued magnets on the back, so it can easily displayed on a fridge or anything else metal!

This little project uses a card sized envelope. You seal the envelope and cut off the top part, so it can be used as a lid. You then use the crimping tool to crimp the envelope, which makes it small enough to fit inside of the piece you cut off for the lid. I enclosed a little magnet inside which was made out of chipboard, paper, and stickers.

Here is a diaper folded pouch. Yep, you fold a square piece of paper like a diaper, embellish and fill with goodies. I used a 12x12 sheet of paper for this project.

Keepsake Box

I purchased these keepsake boxes from Close to My Heart and made them for my mom and mother-in-law. They were fun and not very hard to decorate. The closures on these boxes are magnetic, so they are easy to open and close.


Jul 1, 2010

Altered Clipboards

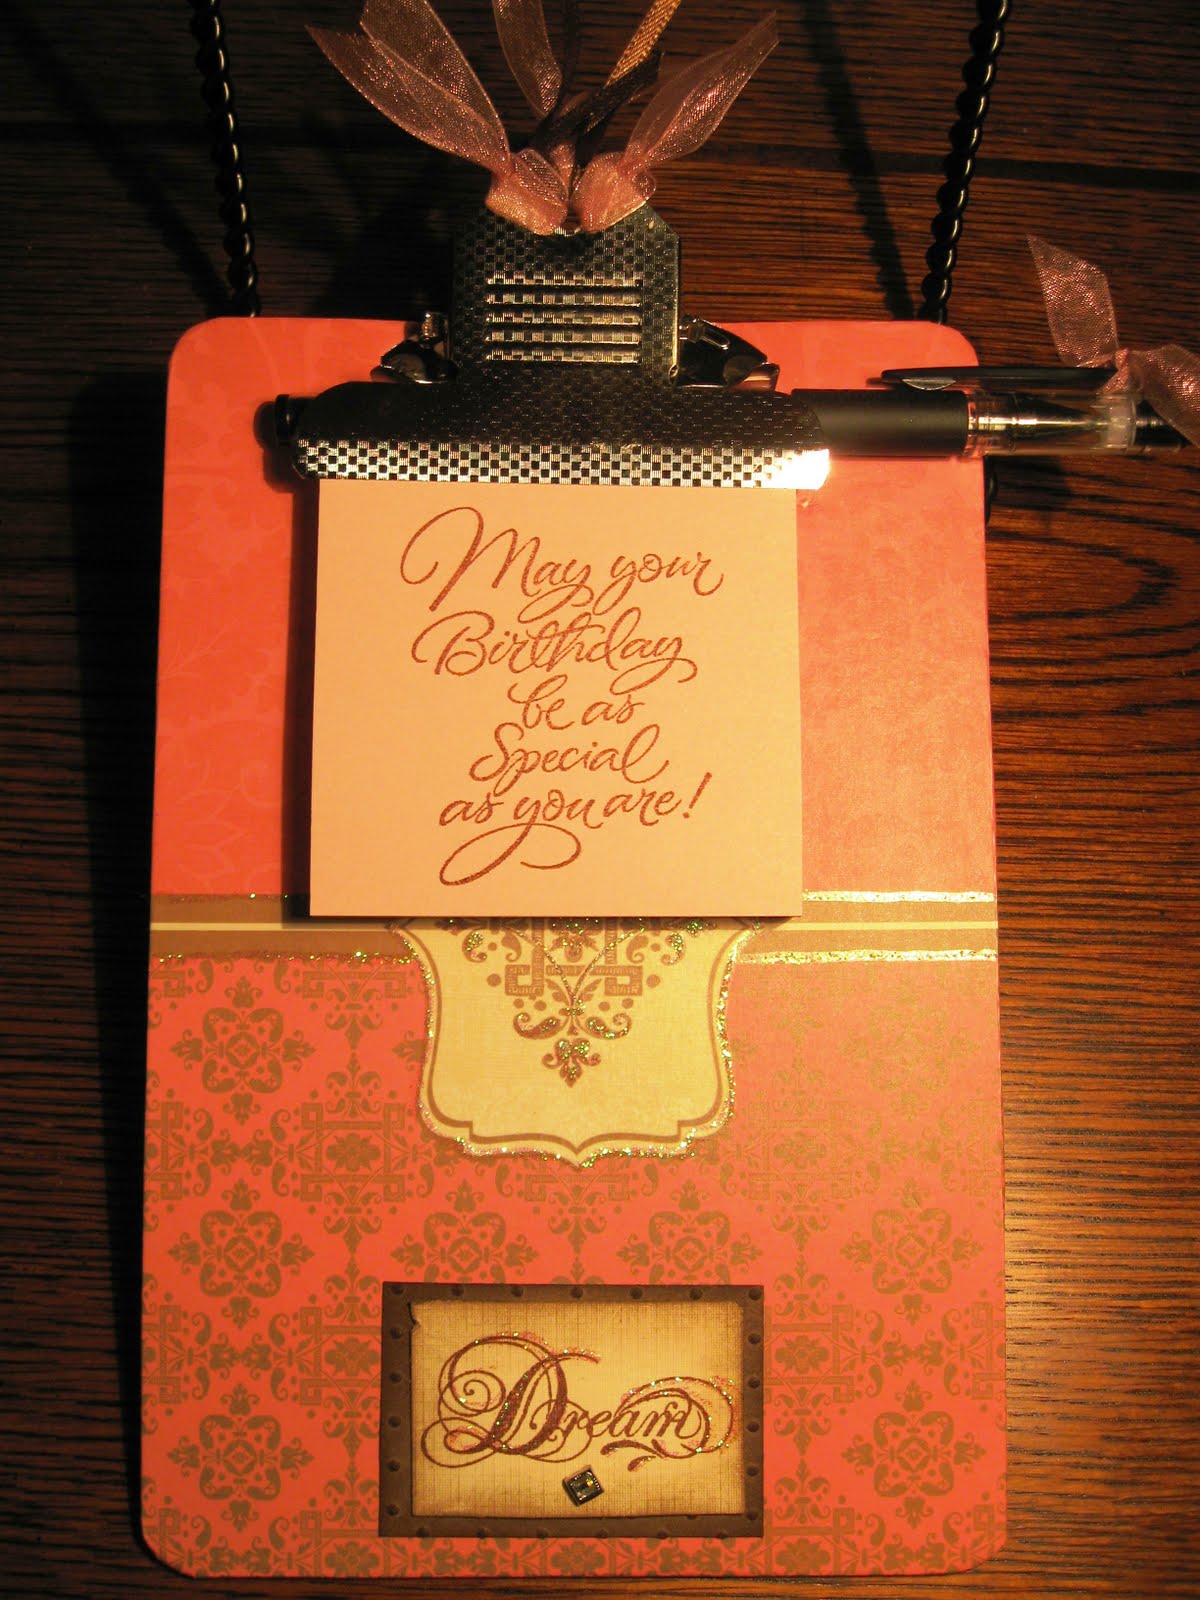
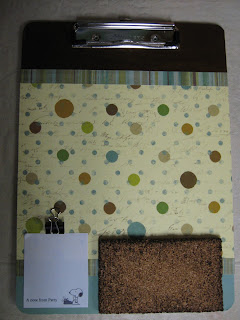
Here are some altered clipboards that I have made. I made the Snoopy one for my Secret Sister. I know I seem to say this a lot, but these too are pretty easy to make and do not take a lot of time. I glued the paper onto the clipboard using Mod Podge and once that was dry I put Mod Podge over the top of the paper, to make it more durable and able to be wiped off, and let that dry.

I absolutely love Gorilla glue! That is what I used to glue on the cork board, paper clip and the thumb tacks to the glass pebbles.

Helpful tip: When using Gorilla glue a little bit goes a long way. It expands and if too much is used you will have rock solid glue around the edges that doesn't look all that great. Yep, I know this from experience. :)

For the tacks that are on the cork boards, I glued coordinating paper to the backs of clear glass pebbles using Mod Podge glue and once that was dry I used Gorilla glue to glue on the thumb tack.

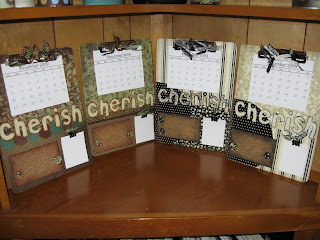
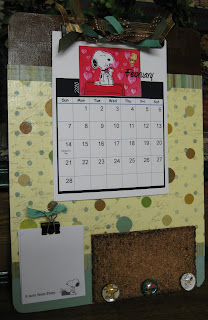
I made the calendars on the computer and attached a years worth to the clipboards, used my Cricut to cut out the letters for the word CHERISH and the paper that I used is from The Angel Company. Now you can give it a try!