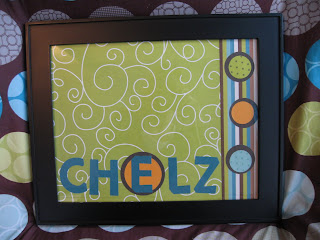
Here is a fun and easy project that make great gifts too.
First I cut some metal flashing to fit inside of the frame I picked out. The metal is very sharp, so I edged it with masking tape.
I then chose paper that I wanted and glued it onto the metal piece.
I made magnets by glueing magnets onto the backs of buttons and clear glass pebbels. This makes it easy to attach pictures and notes.
All new posts will now be at: www.dippitydot.blogspot.com I hope that you will continue to follow my blog at the new address! :)
Background
Jun 30, 2010
Jun 25, 2010
Window Frame Message Board
This is my most recent project. We just finished with a basement remodel. I kept the old windows, so I could use them to create message boards. Here is what I did and how it turned out.
Ok, I have no idea why this picture keeps flipping on me, but I took the window and spray painted it the color that I wanted. Once it was dry I glued cork board into the center pane and cut two pieces of metal flashing for the other two panes.
I then covered the metal flashing with fabric and glued them into the two side panes.
To finish this project off I used a rub-on saying, screwed hooks on the two bottom front corners, and put picture hangers on the back side. I am tickeled at how it turned out. What do you think?
A perfect fit!!
Subscribe to:
Posts (Atom)